Install Éclair on Hostinger
Contents
- The plan and control panel at a glance
- Step 1: choose PHP 8.3
- Step 2: turn on the HTTPS certificate
- Step 3: delete default.php
- Step 4: upload Éclair's files
- Step 5: run the setup wizard
- Step 6: check after installation
- Pitfalls specific to Hostinger
- Install Éclair on Hostinger: what if something goes wrong?
- Key points
- Going further
- Frequently asked questions
You install Éclair on Hostinger entirely from hPanel, in about twenty minutes. The good news: PHP 8.3 is the default version there, and the outgoing connections Éclair needs are open. Two points need your attention: the default.php file to delete, and the PHP version, shared by every site on your plan and impossible to downgrade.
The plan and control panel at a glance
| Item | At Hostinger |
|---|---|
| Control panel | hPanel, Hostinger's own control panel |
| Web server | LiteSpeed; .htaccess supported |
| PHP version | 8.3 by default for new sites; 8.2 to 8.5 available |
| Public folder | public_html |
| ZIP extraction | Yes, with Extract in the File Manager |
| Outgoing connections | All ports open except 0 and 25; cURL enabled by default |
| Price checked on November 1, 2026 | Premium: €2.49 excl. VAT/month over 48 months, i.e. €119.52 excl. VAT paid upfront, then €9.99 excl. VAT/month (Hostinger pricing, in French) |
This rate is a Black Friday promotion, shown in euros and excluding VAT on Hostinger's French page. After the 48 months, the contract renews automatically at €9.99 excl. VAT/month for the same term. Premium includes 3 websites and 20 GB of SSD storage.
Step 1: choose PHP 8.3
- In hPanel, open Websites, hover over your site and click Manage site.
- In the sidebar, open PHP Configuration.
- If the version shown isn't 8.3, choose 8.3, then click Update.
- Wait about two minutes: the change isn't instant.
Step 2: turn on the HTTPS certificate
- Open Websites, then Dashboard for your site.
- Go to Security, then SSL.
- Click Install SSL. If this button doesn't appear, a certificate is already installed.
- Wait until its status changes to “Active”, which takes a few minutes. Renewal is automatic.
- On the same screen, turn on Force HTTPS.
Éclair also enforces HTTPS on its side: when you run the wizard over https://, it ticks Force HTTPS in Settings › Advanced, and once the site address is verified, every visit is redirected to the official address. Both redirects point the same way.
Step 3: delete default.php
Hostinger puts a default.php file in public_html. As long as it's there, it can show up instead of Éclair.
- Open Websites › Manage site › File Manager.
- Go into
public_html. - Right-click
default.php, then choose Delete.
Step 4: upload Éclair's files
The File Manager is all you need, with nothing to install:
- In
public_html, click Upload and uploadeclair-cms-1.8.0.zip. - Select the archive, choose Extract and enter
public_htmlas the destination folder. - Open the resulting
eclairfolder, select all of its contents,.htaccessincluded, and move them topublic_html. - Delete the empty
eclairfolder, the archive and the three.txtfiles that come with it.
With FileZilla, your credentials are in Files › FTP Accounts: the host is the server's IP address, the port is 21, and the username is unique to each website. The password isn't shown: set one with Change FTP password. Turn on Server › Force showing hidden files, then upload the contents of the eclair folder to public_html. SFTP, available on Premium plans and higher, is turned on from the SSH Access page.

Step 5: run the setup wizard
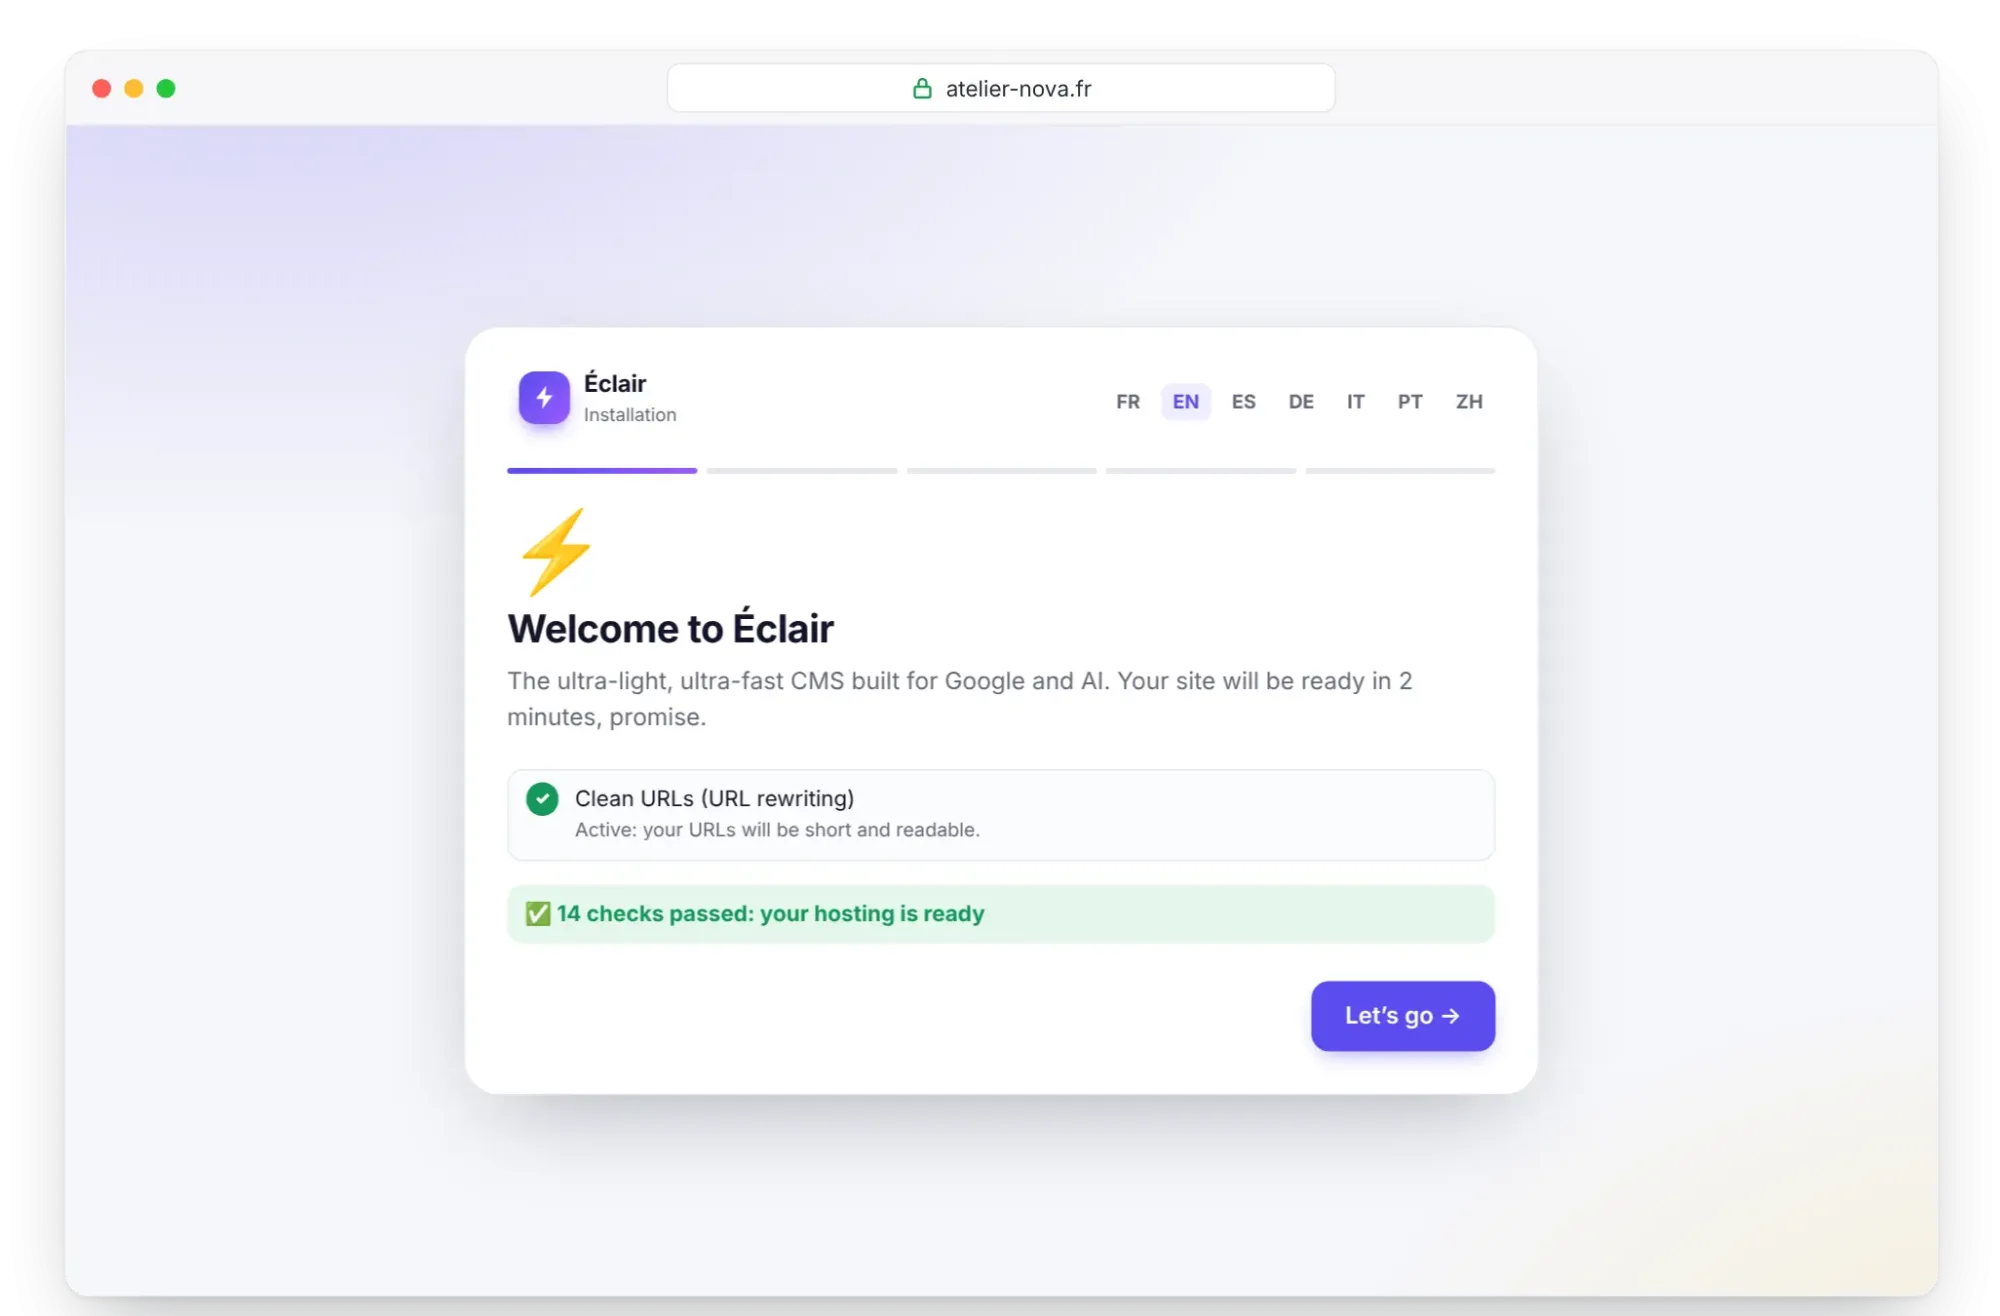
Open https://your-domain.com. Éclair's wizard starts and checks the server: PHP 8.3, extensions, write permissions, HTTPS and “Clean URLs (URL rewriting)”, which must show “Active”. Click Let's go, then follow the 4 questions described in Install Éclair step by step, within 2 hours of this first visit.
Step 6: check after installation
- Open the Security page of the admin. “Encrypted connection (HTTPS) enforced” and “Site address verified” must be ticked; otherwise, click Verify the site address.
- In the “Folder protection test”, every file must show Protected, with the “URL rewriting on” note.
- If you turn on the AI assistant, click Test the connection in Settings › AI assistant. Hostinger documents open outgoing ports: the test should show “Connection successful”.
Pitfalls specific to Hostinger
- The default.php file: delete it before running the wizard (step 3).
- A shared PHP version with no way back: think about your other sites before clicking Update.
- Human support in English only: other languages go through the “Hostinger Agent” AI agent and machine translation.
- A 48-month commitment for the introductory price, renewed at €9.99 excl. VAT/month.
- Hostinger's CDN can return a 403 error to legitimate requests: to test, turn it off in Performance › CDN › Disable.
- A fixed root folder: it can't be changed on Web and Cloud plans. A subdomain gets its folder when it's created (Dashboard › Subdomains); Hostinger advises keeping the suggested one.
- Weekly backups on Premium (daily on Unlimited): also download Éclair's backup from the Security page.
Install Éclair on Hostinger: what if something goes wrong?
| Problem | Cause | Solution |
|---|---|---|
| A Hostinger page shows instead of the wizard | default.php still there | Delete it in the File Manager |
The site answers at the /eclair/ address | Folder uploaded instead of its contents | Move the contents of eclair to public_html |
| 404 error on every page except the home page | .htaccess not uploaded | Upload it again with hidden files shown |
| 403 error on a legitimate action | Hostinger's CDN | Performance › CDN › Disable, then try again |
| No Install SSL button | Certificate already installed | Check that its status is “Active” |
Éclair's other messages are explained on the Troubleshooting page.
Key points
- PHP 8.3 is already the default version: check it, and don't change it without a reason.
- Install the SSL certificate, turn on Force HTTPS, then delete
default.php. - Upload the contents of the
eclairfolder topublic_html,.htaccessincluded. - Look at the renewal price before committing for 48 months.
Going further
- Prepare your installation and Install Éclair step by step: the complete method.
- Essential settings before launch and Turn on the built-in AI assistant.
- Choosing your web hosting for Éclair to compare, and the universal FTP method.
- Hostinger's official help: changing the PHP version, SSL certificates and open ports.
Frequently asked questions
Does Hostinger offer PHP 8.3?
Yes, it's even the default version for new sites. Versions 8.2 to 8.5 are offered in PHP Configuration, and Éclair works with each of them.
Can I install several Éclair sites on the Premium plan?
Yes, up to 3 websites, each in its own public_html folder. However, they share the same PHP version.
Which languages does Hostinger's support speak?
Human agents answer in English for all of Hostinger's brands. In other languages, French included, you go through the “Hostinger Agent” AI agent and machine translation.
Does Éclair's AI assistant work at Hostinger?
Yes: cURL is enabled and all outgoing ports are open, except 0 and 25. Calls to Claude or ChatGPT go through port 443.